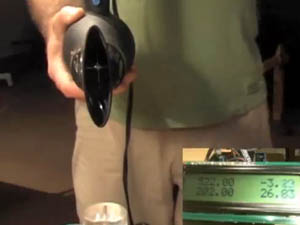
8/10/10 Update: It’s alive!
Froncioni has the probe working. Check out the video of a test with a hair dryer.
7/1/10 Update: Houston we have yaw
Froncioni has managed to measure yaw in a wind tunnel. Check out the new probe head and technical details on his blog. This brings him closer to solving the hardware end of the problem.

Original posting below:
On the heels of Aerolab, Andy Froncioni has decided to take on another obstacle in field aero testing: wind speed and yaw angle. The challenge is to build a sensor that will measure wind speed and angle with minimal impact on the rider’s CdA, and then expand on the Aerolab software to calculate CdA as a function of yaw angle. The first generation sensor will be a three holed probe that will extend in front of the aero extensions, with data logged by a version (or two) of Justin Knotzke’s Golden Embed. Eventually we hope to integrate the sensors into aerobars and distribute the units to coaches and researchers.
In honor of the creator of Virtual Elevation, the idea that started this ball rolling, the project is named WAnG Chung, or Wind Angle Gauge Chung testing (naming credit Adam Haile).
Below are Froncioni’s notes and photos as the project is documented in a Google Wave. You can see the latest updates of the Wave at Froncioni’s blog.
Goal
The Chung-On-A-Stick Project is a bike sensor that sniffs out the planar components of air velocity, (vx,vy). The sensor outputs its signal via a wireless ANT+ channel, in MASTER mode. The signal can then be collected and logged by any head unit that is "Chung-On-A-Stick aware". The initial target head unit is Golden Embed, or a derivative, but any head unit manufacturer is welcome to join in.
Data collected from Chung-On-A-Stick is analyzed by Golden Cheetah’s Aerolab module. (We are considering a name change for Aerolab to "Chung-O-Matic" for the sake of consistency. 🙂 ) It’s not quite a wind tunnel killer, but it’ll be pretty close. It should allow a skilled person the ability to improve aerodynamic drag of a rider/bike combination under a wider range of ride conditions than presently possible.
Aerolab is modified to handle multi-component velocity data from Chung-On–A-Stick. You can read about Aerolab here. The functional dependence on yaw of CdA (and possibly Crr) needs to be incorporated into the underlying equation:
F – Crr(yaw) * m * g * cos(theta) – CdA(yaw) * 0.5 * rho * v_air^2 – m * g * sin(theta) = m * a
( Crr depends mildly on yaw because riders usually compensate by changing the bike’s roll angle in a cross-wind.)
From there, there are several possible approaches to solving for CdA(yaw) ( and Crr(yaw)):
• a spectral-in-yaw approach where an N-th order regression is performed using N-1 basis functions (eg. polynomials, or trig harmonics) in the yaw dimension
• a collocation method where yaw bins (ranges of yaw values) are solved individually for Crr and CdA.
• a "continuous binning" which is based on the idea that CdA may be a function of yaw but it’s a smooth function of yaw. This means that it might be possible to create small windows of the data and slide across the windows constraining the change in CdA to be smooth across windows. (Robert Chung’s idea)
As far as I know, no published version of multi-component virtual elevation presently exists. In the three approaches above, the end result is the same: a graph of the Crr and CdA as a function of yaw angle.
A Brief History of Logging Aero Forces
There is nothing fundamentally new about logging aero forces on a moving vehicle. The idea of using a Pitot tube on a car, for example, is ancient. You can even buy a Pitot tube keyring from McLaren’s F1 store now. The earliest system that comes to mind is from the 80’s, but the Pitot tube might’ve been in use even before that. A modern F1 car uses a Pitot tube and a data logger, even to the detriment of aero drag, because logging all the forces that govern a car’s behaviour is the most important thing you can do to improve lap times. Look at the size of this this thing!
Some reading material:
http://www.racecar-engineering.com/articles/other/301744/how-to-use-pitot-tubes.html
http://adsabs.harvard.edu/abs/2008arXiv0809.3194A
In case anyone’s wondering, it’s called "Chung-On-A-Stick" as a reminder that virtual elevation is the brainchild of Robert Chung, of UC Berkeley. And that the initial version will look be a small probe on a stick.
The Probe
The flow sensor will be a 3-port Pitot tube, used widely in aerospace applications requiring yaw. Our 3-port tube is significantly altered to improve yaw sensitivity at relatively low speeds. The basic shape is this:

Chung-On-A-Stick Probe, Version 0.1
I am also getting 2 more probes made, in various shapes and sizes, to allow me to find the best yaw sensitivity and overall accuracy. The probes will have 0.03" ID Tyvan Micro Bore laboratory flexi-tubing coming out the backside.
Here is the newest member of the wedge family – a Dacron thin wedge (30 degrees) with 2mm holes:

Probe, Version 0.2, Back View

Probe, Version 0.2, Oblique View
And an Aluminum version, with 1mm holes!

Probe, Version 0.3, Back View

Probe V 0.3, With Micropressure Sensor

Micropressure Sensor With 1mm Tubing (Perfect!)

V 0.3 Probe With 1 mm Tubing (Perfect!)
Pitot-Type Sensors
The most important component of the system is the micro-pressure transducers used to sense the differential pressures generated by the flow pressure. After some looking around, I found these . My initial selection was the MB-LPS1-01-200B5R sensors, which can handle +/- 2" of water.
200 means 2" of water full-scale. "B" means balanced, or, +/- 2" of water. "R" means ratiometric, or, proportional to the supply voltage.
The 2" water estimate is based on the following calculation:
dP = 0.5 rho v^2
At v=30m/s the differential pressure, dP, is 0.5 x 1.2 x 30^2 = 540 Pa or 2.16" water .
I also figured that it should detect the same pressure delta both backwards and forwards, so that’s how I came up with the +/- 2" water. I figured that would be enough to make sure I didn’t max out the pressure sensors. I chose a "B" (balanced) type sensor that allows pressure swings in both directions.
I also have 5 other (non-free!) pressure sensors coming in tomorrow, which are 2x, 5x, and 10x more sensitive than the ones I currently have.
The output of these sensors are called "ratiometric" because they output full scale supply voltage at full-scale pressure. That means for a 5V power supply, the sensors will output exactly 2.5V when no pressure difference is detected, 0.5V when there is a 2" water pressure differential one way, and 4.5V when there is a 2" water pressure differential the other way.
Hot-Wire Sensors
A second option for sensing flow velocity is a hot-wire flow sensor. The state-of-the-art in that regard is definitely the SenFlex hot-wire film array.
I received 2 samples of this technology, and I’m really considering trying to make them work on this project. Here they are:

Two SenFlex Hot-Wire Film Sensors

Tungsten Hot-Wire Tip (far right)
This technology, arranged in a suitable array, could be used on a wedge-like probe to determine velocity magnitude and direction. I’m excited that this technology exists — it seems so futuristic!
Placement
The initial positioning of the sensor will be as a clip-on unit. Tape, Velcro, zip-tie… whatever will keep it on my extension bars. But the real cool part will be integrating the sensor into an aerobar. Most modern planes have an integrated Pitot system.
Here is Andy Shen’s drawing for placement on his Vuka aerobars. This might give rise to the Chung Bar, or Chung-In-A-Bar.

Integrated Pitot System on Bars
Prototyping A Solution
I breadboarded up the 3 (free — thanks MicroBridge!!) pressure sensors I got. A simple voltage divider involving only 2 extra components is all that’s required. Here’s what it looks like:

Pressure Sensors on a Breadboard
I used 3 sensors simply because I had them. I left one port open on each of them and connected the other end to my wedge probe as follows:

Probe Hooked up to Sensors

Probe Looking Really Mean!
The actual configuration I’ll be using is a 2-chip solution. One chip will differentiate right-left balance, while the other will measure front-back pressure drop. The wedge angle will determine the sensitivity needed for the right-left sensor. Because MicroBridge sensors come in a wide range of sensitivities, I’m not worried about getting the right range dialed in.
Preliminary Results
The biggest problem I’m having right now is that I don’t have a big enough fan to blow enough air to properly test things. That will require a flow bench, for which I’m seeking a solution.
But for now, I am just blowing on the sensor with .. umm.. well, with me. 🙂 Although this means nothing, I just wanted to show you how this arrangement could work. Here is what I get:

No Wind At All

Straight On Wind

Left Wind

Right Wind
The results here are one of the few times in my electronics life that a chip has worked exactly as I had expected. I’m really high on these MicroBridge micropressure sensors. Simple, stable, linear…
To Do List
Here is what I think the project needs right now:
a proper flow bench ( http://www.diyporting.com/flowbench.html or similar)
more sensitive pressure sensors (on the way!)
better machined probes (on the way!)
software to handle the 2 components of velocity in Aerolab
(vx,vy) connected to the analog-to-digital pins of Golden Embed
firmware modification to Golden Embed
I’m gonna use this line in my next film:
“I am also getting 2 more probes made, in various shapes and sizes, to allow me to find the best yaw sensitivity and overall accuracy.”
Ouch! I wish I hadn’t written that! 🙂
i have to say this series is the first technical stuff on nyvc i just can’t read. i tried a few paragraphs here and there and i still don’t even have the slightest idea what the product is for or what it may mean for me.
can we do an executive summary or is there a link to one?
http://www.bigassfans.com/
And yes it is real
There was some work done on the site today, probably just an anomaly. Here’s Andy F.’s response:
Thanks for your comment. You may be right — this article is a quite loaded with historical context. I’m only too happy to give you an executive summary…
Virtual elevation is a young, growing trend in the cycling tech world. Ultimately, its aim is to sniff your coefficient of rolling resistance (Crr) and you aero coefficient of drag (CdA). Both of these quantities are important if you’re a time-trialer looking to shave a few seconds off your time.
The Chung-On-A-Stick Project is aimed at making an aero probe that can sense the magnitude and direction (yaw) of the wind hitting you and your bike.
Why is this is important? Because your aero drag is dependent on which direction the wind hits you. And to measure the drag, you need to know the direction of the wind.
That little wedge is the missing piece of a long puzzle that began with Robert Chung’s first formal description of the Virtual Elevation (or Chung) Method: http://anonymous.coward.free.fr/wattage/cda/indirect-cda.pdf .
If you have any other questions, please feel free to ask them.
Cheers,
Andy
why did you move the comment to off topic. it’s specific to this article, and the others before it.
and i’m guessing by the low # of comments most people don’t understand it either.
not trying to be critical.
Moved from Off-Topic:
is the intent to be more of a “reality” check on aero stuff vs. in the tunnel/more controlled environment?
what do you do, ride, come home, analyze data, make adjustments, ride again, lather, rinse & repeat?
well that’s probably better–or at least more affordable–than $400+ an hour in a high tech tunnel…
is the intent to be more of a “reality” check on aero stuff vs. in the tunnel/more controlled environment?
Not exactly. We already know that when there’s no wind, field tests using a power meter can give the same results as wind tunnels so there’s really no need for “reality checks”. The advantage of wind tunnels is that they’re faster and they let you test at all the directions the wind comes from. The disadvantage is that they cost between $400 and $1000/hr, often with a 2 hour minimum. And if you need more testing next week you’d have to pull out your checkbook again. If you had a way to measure the wind and its direction — well, you do the math.
The Ikea in Paramus has the “big ass fans”. They are real and they are big.
As big as the fans are, they won’t tell you how fast the air is blowing, or what precise direction it’s blowing in. But the idea of a big-ass fan might come in handy somehow. Will think about it…
So, you put your pitot tubes on your aero bars and go for a ride. How do you factor out the effect of riding on wind speed.
The same question asked a different way, I see how you can detect wind direction, but the actual velocity of the wind versus the pressure created while riding is indeterminate.
The little video that was just posted should partly answer your question about airspeed and yaw angle, by the way.
Andy you clearly have too much free time. You need to get out more! Just ride…
I’m going out for a ride right now, as a matter of fact! 😉