Clunk went the bike on every right side downstroke. A quick spin of my right side Speedplay revealed what I feared: I let it go too long between grease injections, and now the pedal was bone dry and spinning freely, its bearings shot.
Even though I try to do all my mechanic work myself, I’ve never dared attempt a pedal rebuild. Mark Purdy convinced me that it wasn’t all that difficult, so he walked me through one pedal and I did the other.
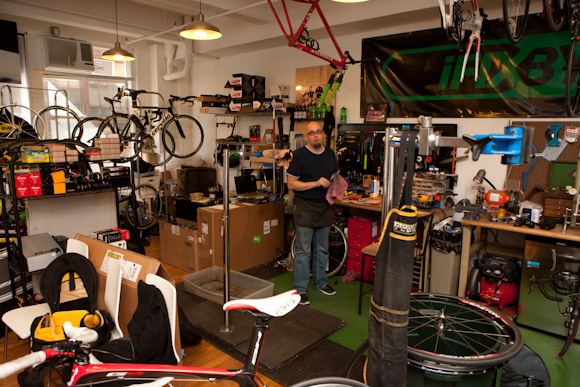
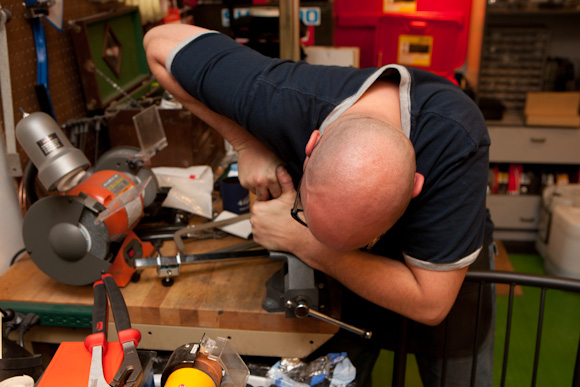
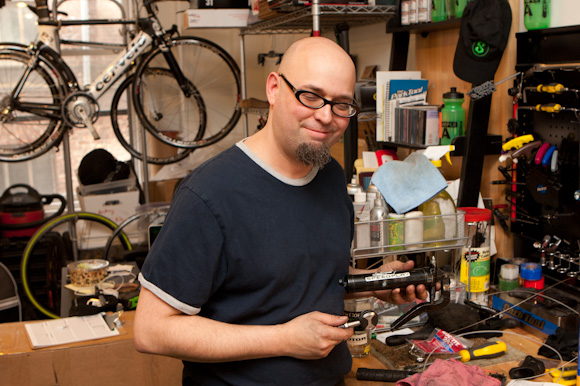
But first, a quick shop tour. As you can see, Mark’s quite busy these days.
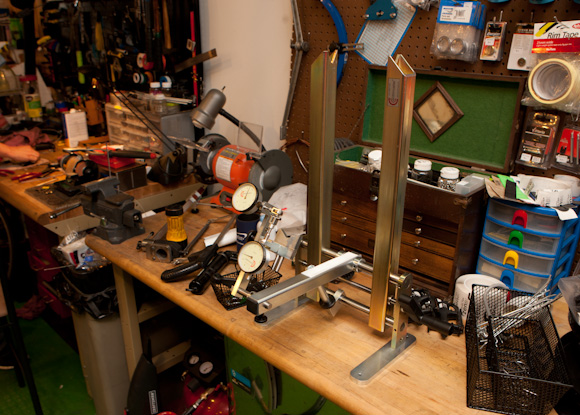
Mark’s new toy, a Centrimaster truing stand. He says it’s transformed the way he builds wheels.

Gauges measure deflection. Each of those units is one millimeter. This thing is a real work of art.
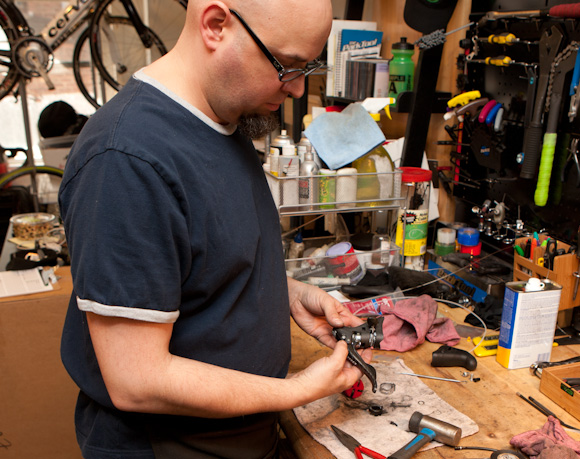
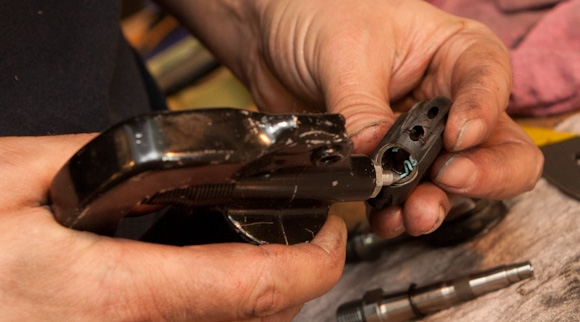
Mark was rebuilding a Campy shifter when I arrived.
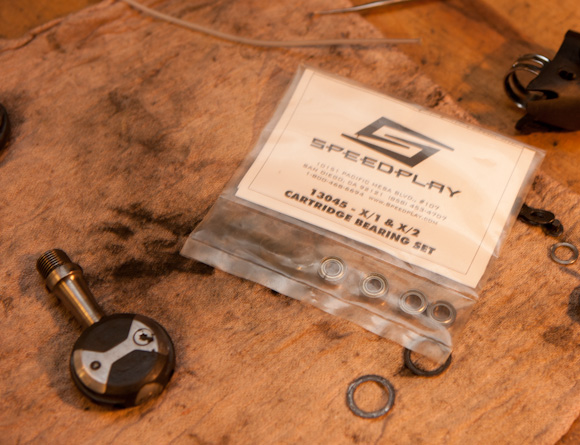
Here’s the basic rebuild kit, 4 bearings. There are also kits that include bowties and pedal bodies.
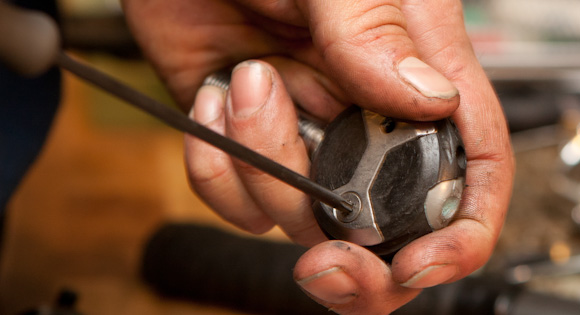
The bowties are attached with Torx 15 bolts. We weren’t replacing the bowties, so we didn’t really have to take these off.
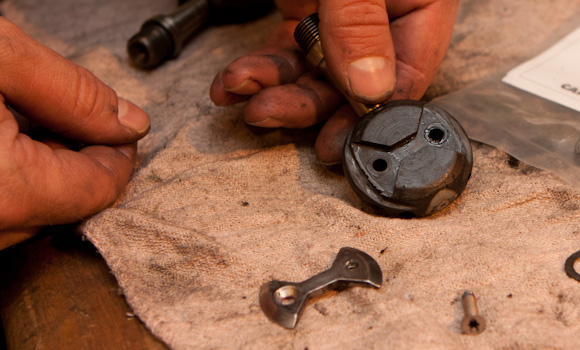
Bowtie removed.
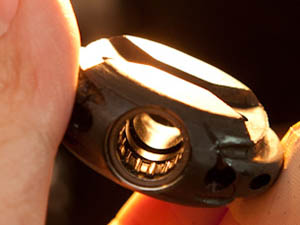
The dust cap comes off and it’s nasty in there, lots of rusty grease.

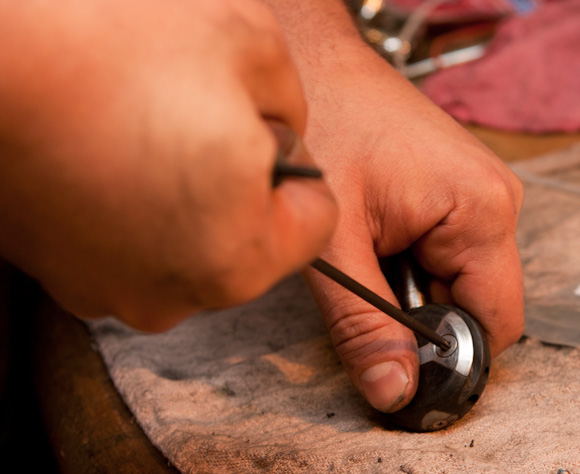
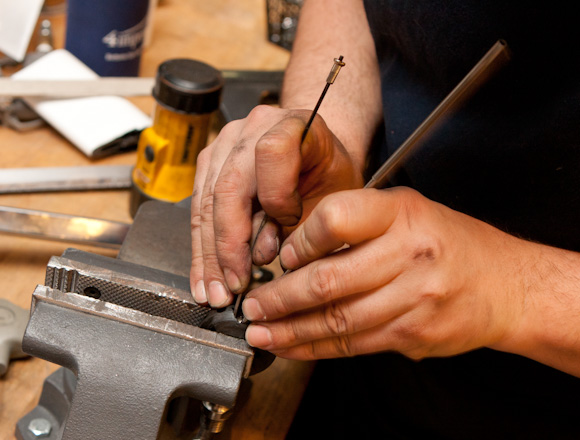
This allen bolt was really frozen. Mark had to clamp the pedal in a bench vise.
Worried that he might round off the allen head, Mark used a Torx 20 wrench to finally free the 4mm allen bolt. It’s a nice little trick – the Torx wrench grabs the corners, giving you a little more leverage with less risk of rounding off the head.
There’s a circlip inside. Mark’s circlip tool doesn’t fit inside the pedal, so he uses two pointy sticks.
And it’s out! More nasty nasty grease. The bearings are not press fit, so they come out with a little coaxing from the spindle, no need to bash them out.
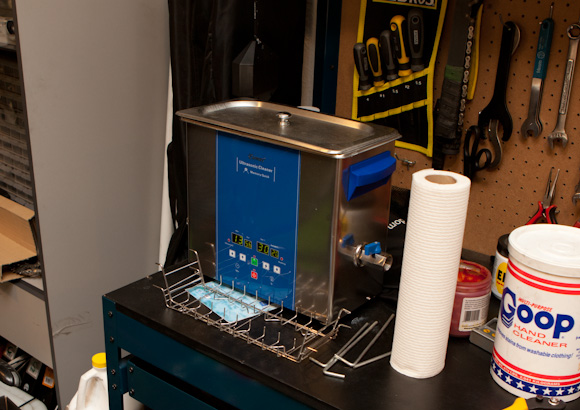
Mark loves his new hospital grade ultrasonic cleaner.
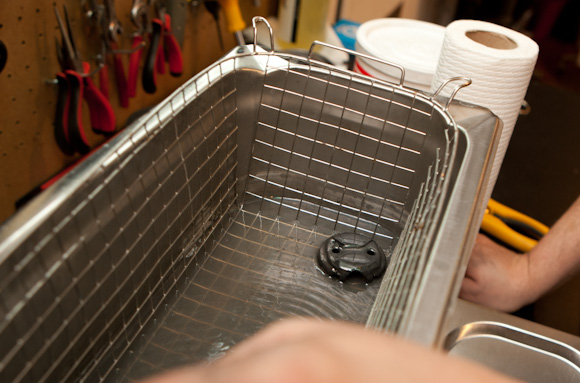
World’s coolest parts cleaner, or world’s nastiest frialator.
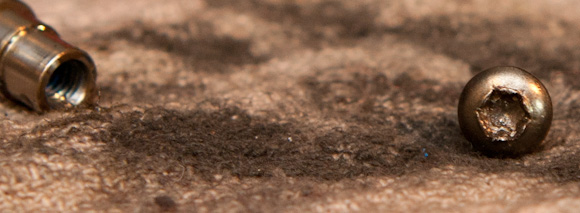
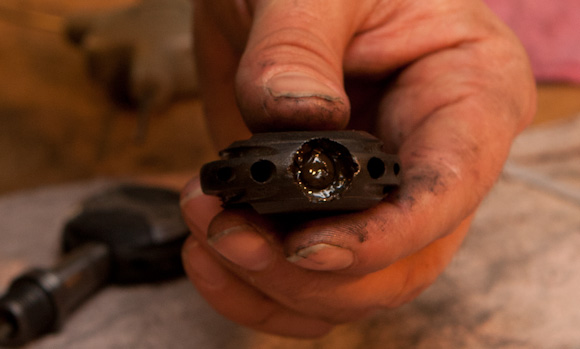
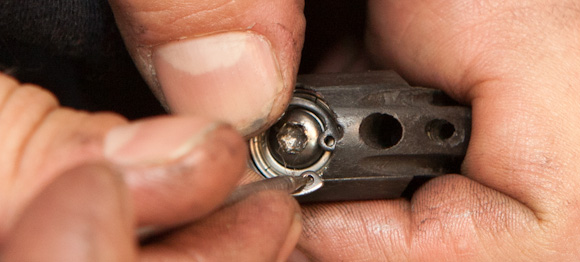
There’s that beat-up bolt head. This step would’ve been my Waterloo if I attempted the rebuild on my own.
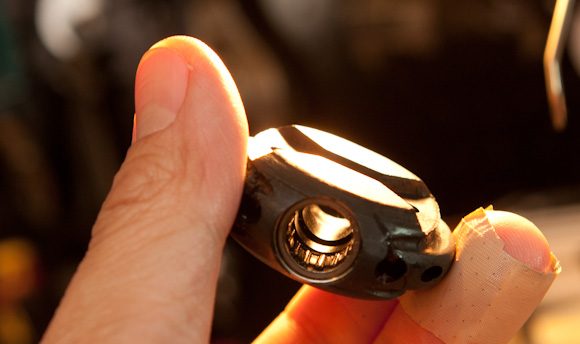
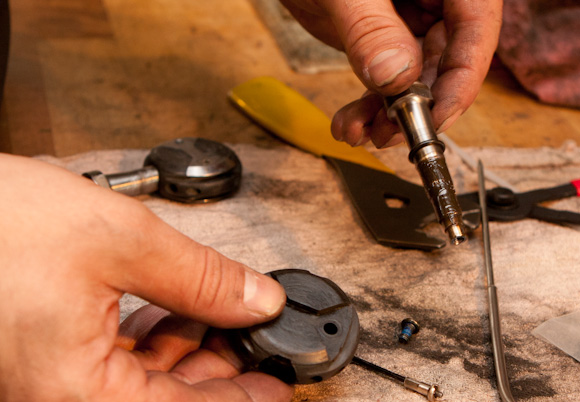
Needle bearings run on the inboard side. They have much more contact area and last much longer. We’re not replacing these today. If they’re shot you can buy a new pedal body with bearings installed.
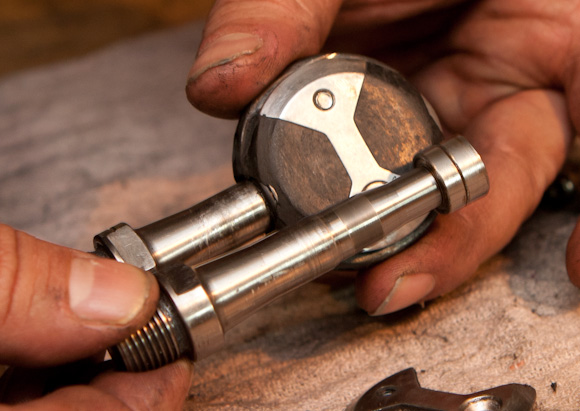
Mark demonstrates where the new bearings go. The matte stripe on the spindle is where the needle bearings roll.
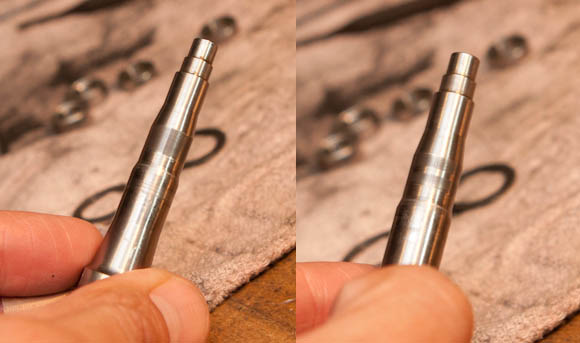
Different amounts of wear on the two sides of the spindle indicate where my downstroke is. Sadly my left spindle (no picture) was evenly worn, so I guess despite my best efforts I still have a big imbalance between my two legs.
Greasing the needle bearings.
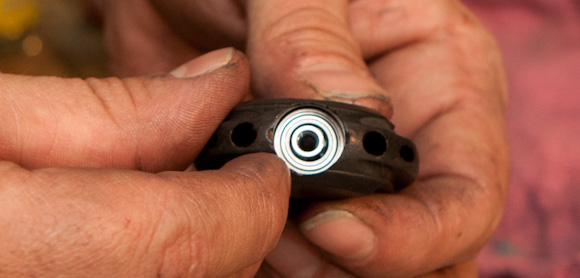
O-ring goes on the spindle, spindle goes in the pedal, then the outboard bearings pop right in, no need for a bearing press.
Bolt replaced.
Circlip popped in.
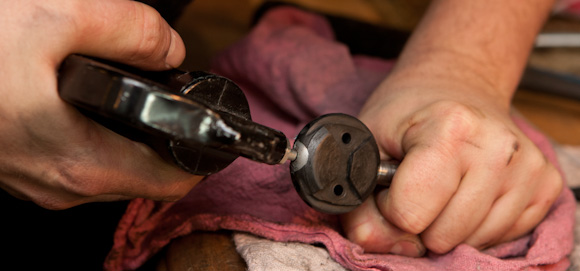
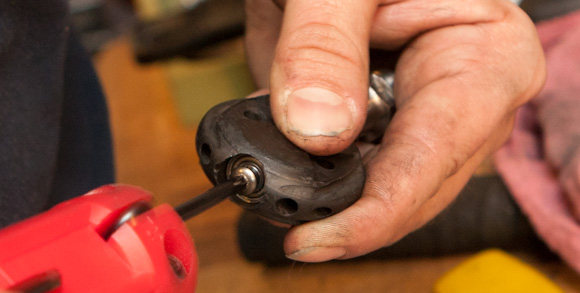
Dust cap on, grease injected.
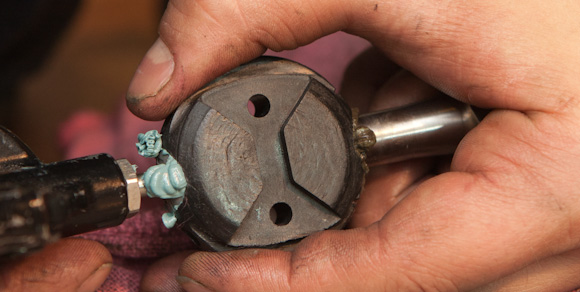
It’s a nasty job. You’re done when clean grease comes out at the spindle. The second pedal had a looser fitting dust cap which allowed the grease to escape before moving through the needle bearings. Mark had to clamp it down onto the pedal body with a pipe wrench while I injected the grease.
Bowtie back on, cover the injection hole, and we’re done.
The perils of not checking your shots right away. Mark was stricken with smugface in the only shot I took.
Once Mark was done I did the left pedal. It wasn’t noisy on the bike but we could feel that the bearings were rough. The bolt at the end of the spindle wasn’t frozen, so the whole process was pain free and straightforward.
Knowing what I know now, I think it’s a doable DIY job. I’d leave the pedal on the bike, as it does the same job the bench vise did for the more awkward steps. It’s nice to have every tool in existence at your beck and call should things go pear shaped, but for most instances it’s a simple job. But you should do the smart thing and check your pedals now, and hit them with some fresh grease.
Andy,
How much does Mark charge to rebuild?
Speedplay charges a lot for the replacement bearings, but they are standard sizes and you can order them online for a fraction of what Speedplay charges. There was quite a to do in some online forums awhile back with Speedplay taking legal action to shut down this guy who was selling replacement bearing kits with rebuild instructions that contained these standard bearings for about 1/4 the price of a Speedplay rebuild kit – I love my Speedplays, but this was really over the top in my view.
What grease does Mark recommend? I used to use lithium grease, but found that it didn’t last that long (200mi or so) and even less in the wet. I switched to marine grease last fall and so far so good.
IFIXPEDYLS
Very well done.
Makes you want to take every part of the bike apart and re build EVERYTHING once a month!!!
Look Keos rock
Purdy to Mengoni
Here in the shop I use Progold EPX grease. But actually, Marine grease is probably a better choice. It will last longer. I don’t know who sells the bearings on there own, aside form Speedplay. I would assume somebody does, but I don’t have a source. Yes, the kits are expensive from Speedplay, but if you grease them regularly, you will rebuild them less often. An option that you don’t really have with most other pedal systems.
–Sensei
eBay is the best online source for small quantities of bearings IMO. As noted, bearings come in internationally standardized sizes.
Some local bearing distributors will sell you a few. Look up the Motion Ind. or Bearings Inc. location in your locale and give them a call.
I charge $40 labor to overhaul both pedals. But that doesn’t include the bearings, of course.
I wanted one, till I went to the web site and saw the price. The V shaped probe is a clever and simple device, I’m surprised no one thought of that before.
If you are looking for cheaper bearings, pop out your old bearing and and there will be numbers on the seals or the body of the bearing. Any major bearing house will be able to get you the ones to match. Just keep in mind that most of the big bearing places only want to sell in large amounts, so the price may not be that much better.
Andy, if those are your pedals you should upgrade to the Speedplay Zero. The adjustable float rocks…
I’ve been on X’s for so long I don’t even notice the float any more, can’t see a reason to limit the float.
http://www.bocabearings.com
Is the shop authorized to rebuild Speedplay pedals? They have issued Cease and Desist letters suggesting among other things that rebuilding pedals induces copyright infringement to others providing this service.
Were the bearings Speedplay sourced? Speedplay has threatened litigation over second sourcing their utterly conventional bearings with utterly conventional specs from a half-decent bearing retailer for next to nothing.
Andy, you may get a DMCA takedown notice as Speedplay has previously threatened litigation for rebuild instructions. They would claim this article induces copyright infringement.
Google “speedplay rebuild instructions”
Speedplay is a perfect example of what’s wrong with intellectual property regulation in the U.S.
hey great article. im stuck with these because those shimanos and looks hurt my knees, but my lbs doesn’t know what to do when they don’t roll smoothly. I didn’t even know how to greae them or that you’d have to remove the metal thingies for that. I mean, of course i could switch to spd’s (but that’s for commuters, right?) or time (also a bit unfashionable). So I’ll probably pass this on to him…
The official SpeedPlay instructions note that if you heat up that end bolt to 300 degrees, you will break the bond on that bolt, and you don’t have to resort to brute strength to remove it. Just go to an electronics supply store and buy a good soldering iron, and press it to the bolt head. Get it good and hot, although I feel certain you want to keep the tip away from the resin body. I bet it wouldn’t take more than 30 seconds to get it hot enough.
Still want to use that vice, though. Probably more than ever, actually…
They use LocTite red on that bolt. Meanies. They should use the blue stuff instead. But you should probably apply new LocTite to that bolt when you put it back in.
Great article. I have done repairs on quite a few pedals. (x series & zero series)but keep running into the same problem. I have to reuse the 4mm allen bolt. Where can I find these bolts for sale? I can get the bearings locally, but the bolt is a real headache for me. Thanks in advance.
http://www.mcmaster.com/#socket-head-cap-screws/=ka7aw2
The guy who was the victim of Speedplay harassment still sells bearings, etc. on ebay, but individually. Look for seller frikinspit_2. You can read his whole saga on the weight weenies website forum. Read topic “Speedplay Threatens Customers”.
You state the allen bolt was really stuck and he using a 4mm allen wrench. The instructions online state it’s a Torx screw (T-20) size. Not an allen. I initially made the same mistake, as there was a lot of grease disguising the head, and the allen really didn’t seem to grip. Easy to tell it’s not an allen when it’s clean. Always check the website/instructions. They can and do help.
Nope, look at the picture. It’s an allen, they switched at some point to Torx.
Andy — did your right pedal clicking go away after the initial rebuild? My zero left pedal has developed a distinct click for the same reason as yours :(. I’ve replaced all bearings (including the needle bearing) and the o-ring, but still get a lot of play (in & out) after the bearing replacement, and with the spindle screw fully torqued down. I wonder if my spindle is worn or if it’s the pedal body that’s worn, or something else?
The rebuild fixed mine. I’ll ask Mark to chime in.
What you are describing sounds to me like either wear on the axle at the bearing race or wear in the body where the bearing presses in. You will either need a new Axle or a new Body Kit. Whichever is the culprit. Cross your fingers & hope it’s not both.
Mahalo, Andy & Sensei. I’ll try replacing the spindle first, as my gut tells me the race got worn down (1 yr without greasing:( ). Maybe it’s time to consider Ti spindles :). Thanks again. -Grasshopper
Injecting heavy grease removed all of the slop & wiggle in the bearings/spindle, surprisingly. The click is gone. I’ll hold off on replacing the spindle/more parts unless the clicking comes back. Will keep the pedals packed firm w/grease & check monthly. Mahalo. -GH
2 each – HK1010 Needle Bearings. Measurements: OD=14mm BORE=10mm WIDTH=10mm.
2 each – Bearing 136 also known as 686z, 686zz, 686 z, 686 zz. Measurements: OD=13mm BORE=6mm WIDTH=5mm
2 each – Bearing 137 also known as 137z, 137zz, mr137, mr137z, mr137zz, mr 137, mr 137 z, mr 137 zz. Measurements: OD=13mm BORE=7mm WIDTH =4mm
2 each – Inner Retaining Ring BORE=1/2″ WIDTH=0.03″
2 each – Rubber O-Ring. ID=5/16″ OD=7/16″ WIDTH=1/16″
All of these are readily available online – Amazon or eBay. Bearings come in 10 packs for about $9.00 each, the retainer clips and o-rings are pennies each. For under $30.00 you can get enough to rebuild 10 pedals! These bearings listed are for X1 & X2, Zero Ti, Stainless & Chromoly and Light Action Ti & Stainless.